This article is compatible with the latest version of Silverlight.
Introduction
These series of posts will help you when creating rich data forms with Silverlight in your projects. Silverlight 3 introduced a new control, called DataForm. It enables various methods for display, edit, update and navigation through data. I my previous two articles I gave you a clear view of this new cool control. I showed you how easily you can bind an object or a collection of objects to a DataForm control and the whole bunch of stuff you can do with every data source. I also showed you how you can change the style of the control in order to make it fit your Silverlight application.
This is the final article of this series. I will tell you everything about validating your data when working with a DataForm control and how it affects the control. The process of validation is very important. You should take decision which part (tier) of your application has to contain data validation.
You can run the online demo before you read the article to get idea of everything. Try setting invalid values for different properties and when you read the article, you will understand what kind of rules are applied.
Beginning
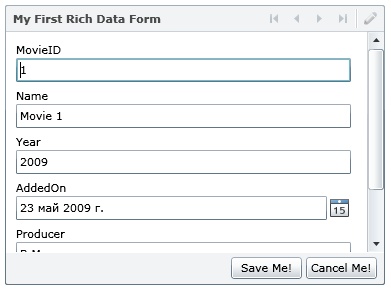
We will use my favorite Movies application, which I used in my previous articles. To remind you, it has a collection of movies. Each movie has a list of properties like an ID, a name, a producer, a year, added on a specific date and a genre. As our application should provide a way to modify the collection, we have to be able to validate user input. This point is very crucial for every business application.
Before doing anything else, you should add reference to two very important assemblies:
- System.ComponentModel
- System.ComponentModel.DataAnnotations
These two assemblies contain interesting attributes, which we are going to use in our project.
Managing Bindable and Read-only Properties
In my article about customizing the DataForm control, I showed you how you can define the way DataForm fields are shown. If you do not want a specific property of your business class to be shown on the form, you can exclude it as not providing a field for it. However, there is simpler and faster way to achieve the same functionality – using the Bindable attribute. It can be applied both to classes and class properties.
Let’s see this attribute in action. As I already said, it can be applied both to classes and class members. First, we will mark a class with it.
[Bindable(false)]
public class Movie
{
…
}
If you start the application you will see just an empty form. This is because we marked our business class as not-bindable. We can also specify the binding direction.
[Bindable(true, BindingDirection.OneWay)]
In this case, our class will be bound to the form, but it will be read-only. This usage does not suit our business aims, but I have to show you the possibilities with this attribute.
When used to mark attributes, this attribute provides the same functionality. In our application, for example, we do not want to see the MovieID property on the form, so we can mark is as not-bindable or one-way bindable to achieve read-only functionality.
If you mark both a class and its members with this attribute, the second one will take precedence.
Managing Edit Events
Do you remember that in the first article we set a property, called CancelButtonContent? We set it, but we couldn’t see it in action. It seems there is cancel-edit functionality. Yes, there is! But, in order to use this functionality, your class should implement a special interface – IEditableObject. This interface defines three methods:
- BeginEdit
- CancelEdit
- EndEdit
You have two variants: you can manage edit stages either on a control level, using DataForm events like BeginningEdit and ValidatingItem, or on business class level, using the IEditableObject interface. However, each of these two ways let’s you achieve different things. For example, if you use the control events, you can manage presentation stuff. But if you use the IEditableObject methods, you can implement business logic. Let’s just implement this interface, without providing functionality in these three methods, and run the application. Now, when you press the Edit button, you can cancel the process:
Managing Display Options
By default, DataForm control takes the name of the property for the label of the field. In many situations you would like to show something more descriptive. Here comes the Display attribute. It manages the name, which will be shown for each property. Let’s apply this attribute to some of the properties.
public class Movie : IEditableObject
{
public int MovieID { get; set; }
[Display(Name="The Movie Name")]
public string Name { get; set; }
[Display(Name = "Which year")]
public int Year { get; set; }
[Display(Name = "When was added")]
public DateTime AddedOn { get; set; }
[Display(Name = "Who produced this")]
public string Producer { get; set; }
[Display(Name = "What kind")]
public Genres Genre { get; set; }
}
Another thing I mentioned in my previous article is connected with a field description. You can assign additional information for each field in order to make it more clear what it is about. All you need is the same Display attribute. It has a property, called Description, which you can use to achieve this goal.
public class Movie : IEditableObject
{
…
[Display(Name="The Movie Name", Description="This is the name of the movie")]
public string Name { get; set; }
…
}
Another thing you can set is the order of the fields. Yes, you can tell which field to be first, which second, etc. And of course you use the same attribute. You have to specify its property Order.
There are other properties of the Display attribute, which help you manage the way a field is displayed.
Data Validation
Everything till now is not completely in the topic of the article, but I decided to put it here. Well, it’s high time I showed you how to validate the input. You can apply different rules to your properties in order to let the DataForm validate them. This goal is achieved with the help of attributes again. They are almost the same as those in ASP.NET Dynamic Data. If you have worked with it, you may find this technique very similar.
With the following attributes you can mark your properties in order to apply a specific validation to them, when used in a DataForm control. All of them support ErrorMessage property, which you can use to assign a message, which will be shown if the input value is not valid. All these attributes are part of System.ComponentModel.DataAnnotations namespace. Here is a list of some of them:
- Required – use this attribute when you want to mark a property as required. If user does not enter a value, an error message will be shown.
Example: [Required]
- Range – use this attribute to specify a range for a property. The type of the property is not necessary to be a numeric one. This attribute will work with each property, if its type implement the IComparable interface.
Example: [Range(1, 500)]
- StringLength – use this attribute to restrict the length of a property.
Example: [StringLength(10)]
- RegularExpression – very powerful attribute. You can specify a regular expression to validate your property.
Example: [RegularExpression(“[1-9][0-9]{3}”)]
- EnumDataType – checks if the input is a valid item of a specific enumeration
Example: [EnumDataType(typeof(Genres))]
- CustomValidation – very powerful attribute, again. It gives you the freedom to define your own validation logic. You have to create a simple class and add a static method to it. The method return type should be boolean and this method has to accept one parameter with the same type of the property.
Example: CustomValidation(typeof(MovieValidator), "ValidateDateAdded")]
public class MovieValidator
{
public static bool ValidateDateAdded(DateTime input)
{
return (input < DateTime.Now);
}
}
You can apply CustomValidation attribute to the whole class. In this way you can validate the whole object.
Another great way to do data validation is in a property setter method. You apply your business logic there and if there is problem, just throw an exception. The DataForm control with catch this exception, when user tries to save the record. Here is an example:
public string Producer
{
get { return producer; }
set
{
if ( String.IsNullOrEmpty(value) )
throw new ArgumentNullException( "Producer is empty" );
producer = value;
}
}
Conclusion
This is the last article of the series. After reading all these articles, you already have an idea how you can use DataForm control in your business applications. You know how to bind an object or a collection of objects, how to customize the look of your control, how to validate the input data.
You see that Silverlight 3 introduced great new functionality and many features of the control. I hope this article will encourage you to go ahead and start using DataForm in your Silverlight projects. In my next articles I will focus on other interesting controls, which you can use to develop rich internet applications using Silverlight.
Source Code
You can download the source code of the examples and test it yourself.
References
- http://silverlight.net/learn/learnvideo.aspx?video=187317
- http://pendsevikram.blogspot.com/2009/03/silverlight-3-dataform-control-features.html
- http://microapplications.com/blog/archive/2009/03/27/328.aspx